PiSketcher
A Robotic Drawing Arm with Two Degrees of Freedom
Samiksha Hiranandani (snh44), Soumyarup Lahiri (sl2625).
Demonstration Video
Objective
Two dimensional pen plotters are commonly used for making diagrams and machine drawings. Our project, PiSketcher is a portable robotic arm capable of sketching various shapes using a drawing instrument on any sketching surface. Built with two degrees of freedom, PiSketcher’s reach spans all points in the two dimensional plane. Controlled movements of the arm across the 2D plane are computed using inverse kinematics. Motorized control also allows lifting up the writing instrument when pressure is not required. PiSketcher has two inbuilt drawing modes - one drawing fixed standard size shapes and one where the dimensions of the shapes can be controlled by the user using push buttons. These simpler shapes can be extended more generally to draw more complex shapes and drawings.
Introduction
To build PiSketcher, we built a mechanical arm with two degrees of freedom using two acrylic pieces. We used two stepper motors to control the motion of the arm with two degrees of freedom. A small attachment for a pen was fitted at the end of the arm. We used a simple servo motor mechanism to lift the pen in order to control stopping/starting drawing. Through software, we carefully controlled the motion of the three motors such that they facilitated the precise motion of the arm to draw the required segments. These calculations were done by using inverse kinematics, calculating the exact angle required to turn to reach a particular (x, y) point in the two dimensional plane. The angle was converted by a conversion factor into a step count to turn the motor. An intuitive menu driven user interface on a touch screen controls the working of PiSketcher.
Design
The hardware component of the project consisted of the mechanical assembly of the arm and motor connections. The software component of the project included controlling the motors and creating the menu driven interface on the piTFT.
1. Hardware
The set up was assembled with some reiterations for improving stability and balance. First, the arms for the robotic arm were cut using a laser cutter on an acrylic sheet. The first iteration of the arms we cut were too short and not suitable for our purpose.
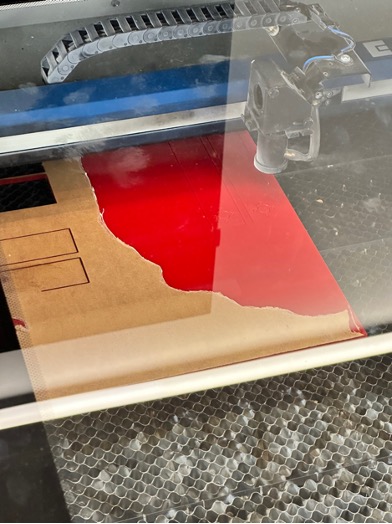
Figure 1: Laser Cutting
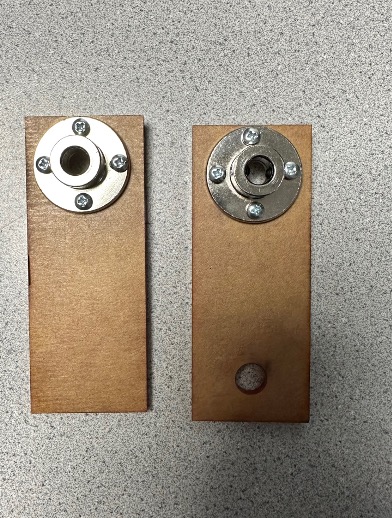
Figure 2: Robotic arms
In the next iteration, we made them thinner and longer. Apart from the links we also used shafts and shaft couplers to attach the links to. A cardboard box was used as the base for attaching the first servo and shaft.
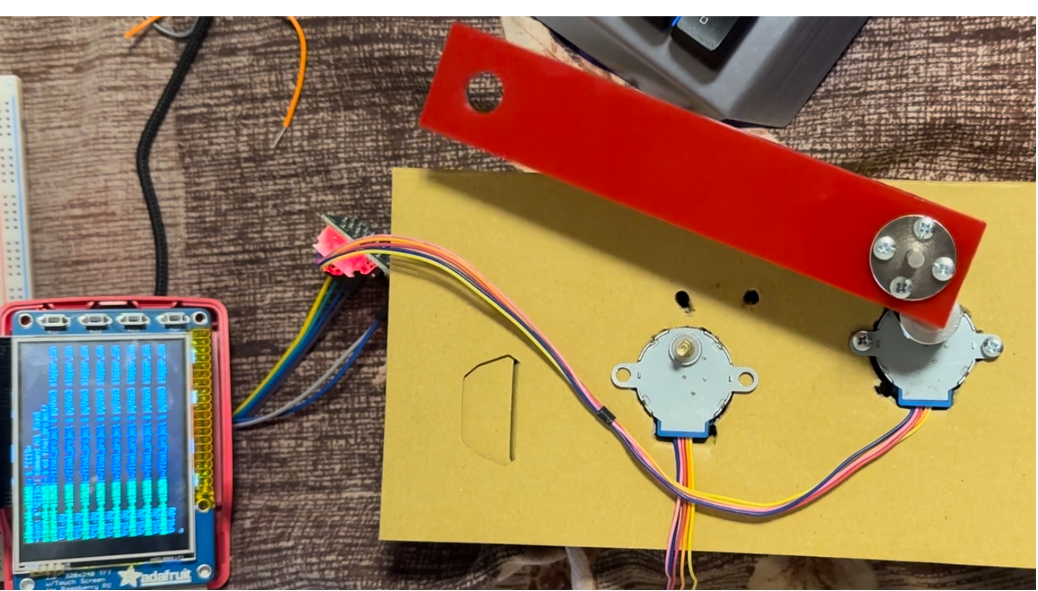
Figure 3: Revised Arms
After verifying the functionality of this setup, we made the final attachments for the second arm and marker. This is shown in Figure 4.

Figure 4: Improved Setup
One of the major issues we faced was that the second link was toppling over. So, in order to balance it, we came up with a counter-weight mechanism at the attachment of the 2 links.
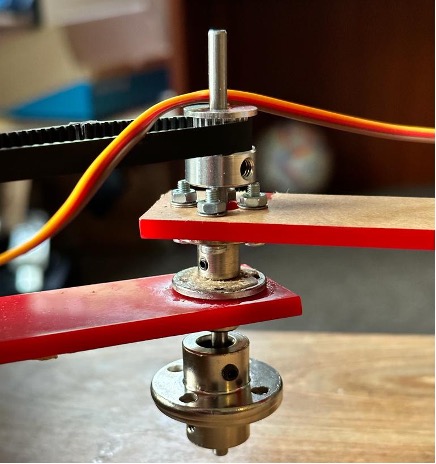
Figure 5: Counter-weight mechanism setup
With testing, we realized that a 5V stepper motor was not able to supply enough torque to turn the entire arm. So we decided to switch to a more powerful 12 V Nema 17 stepper motor for the base motor. Our final setup can be seen in figure 6.
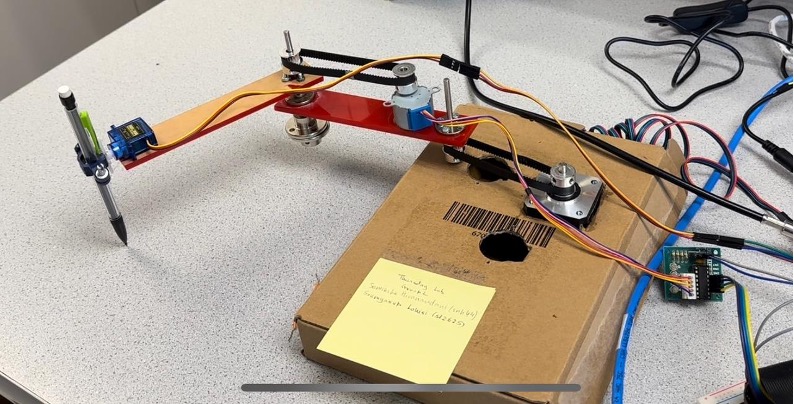
Figure 6: Final mechanical setup
Additional hardware components included the 4 buttons on the piTFT for the manual mode of controlling the dimensions of the shapes. However, these did not require any additional connections and were interfaced with directly as done previously in lab assignments in class.
2. Software
Our software is divided into several modules.
The main program controls the menu on the piTFT, allowing the user to select the different modes (fixed dimension shapes vs user controlled) and which shapes to draw (rectangle, triangle).
Separate classes and methods were created to control the movement of the motors.
The servo motor was used to lift the pen up and down. A separate method was created to lift up and put down the pen by controlling the servo motor to move by around 90 degrees.
Each of the motors were controlled separately and attached to different GPIO pins. The motors were of different types and required different software to control precisely. Generally, the motors were controlled by using a step_delay for a PWM output supplied to each motor.
A single method was used to interleave the control of both motors, using a ratio to control the relative turning of both motors. In a single loop, both motors were controlled in a particular ratio specified according to how much we wanted each motor to turn to generate the line we expected. For a particular ratio x:y, every x steps of motor1, y steps were made on motor2.
The arguments for moving the motors were based on the inverse kinematics equations, converting an angle into a number of steps for the motor. However, some manual adjustments were made based on trials.
For the shapes with fixed dimensions, two scripts were made with explicit calls to the motor control functions in a defined sequence to draw the particular shape. These scripts were called from the main menu program.
For the shapes with user defined dimensions, the general direction of the segment was defined by defining the ratio of turning between the two motors, and the length of the segment was determined by how long the user pressed the physical button.
Result
We did not reach the stretch goals of drawing complicated figures adding onto the simple ones, but we were able to reach our goal of drawing simple shapes, as seen in our demo video. Some of our drawings can be seen in the figures below.
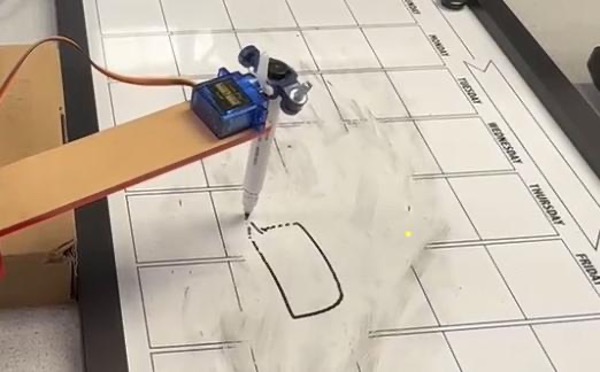
Figure 7: Drawn Rectangle

Figure 8: Letter 'N'
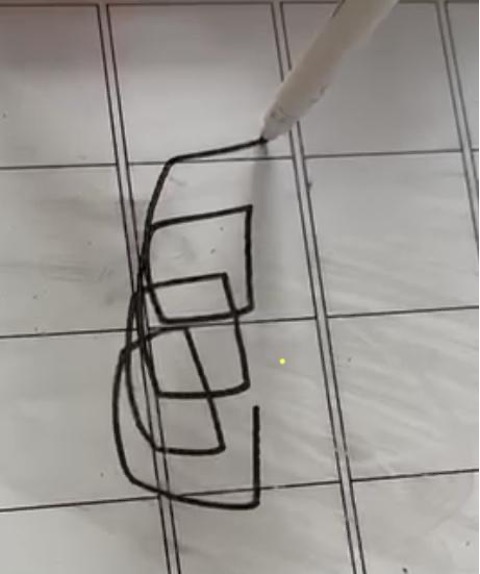
Figure 9: Rectangular Pattern
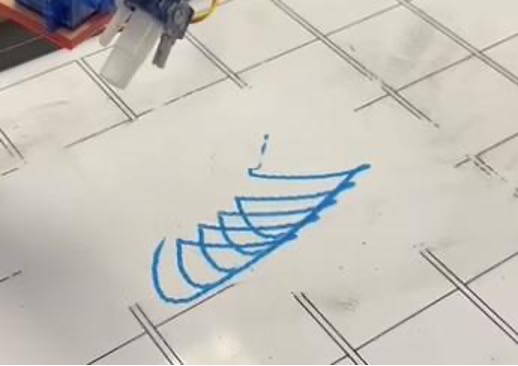
Figure 10: Triangular Pattern
We faced several issues with the mechanical set up. In some cases, the setup was not sturdy which caused the motors to tilt and not move as expected. Sometimes, the varying friction between the pen and the drawing surface would cause the pen to get stuck in the middle and require additional force for the motor to move it.
Conclusion
Overall, we were able to support drawing simple shapes and patterns using PiSketcher. While the control was not as precise as we would have liked, it was good enough to draw simple shapes of rectangles and triangles and also patterns of repeated shapes.
Future Work
Some additional extensions for our project include:
- Adding a power bank for the Pi and a battery pack for the stepper motors and servo, the system can be made completely mobile.
- Improving upon the stability of the system by using more precisely fitted parts and a sturdier base could help draw more complicated figures by allowing more precise control.
- The hardware and software for this project will be designed for drawing on paper, but with some minor modifications, the same system can be used for making precise acrylic cutting as well.
Work Distribution
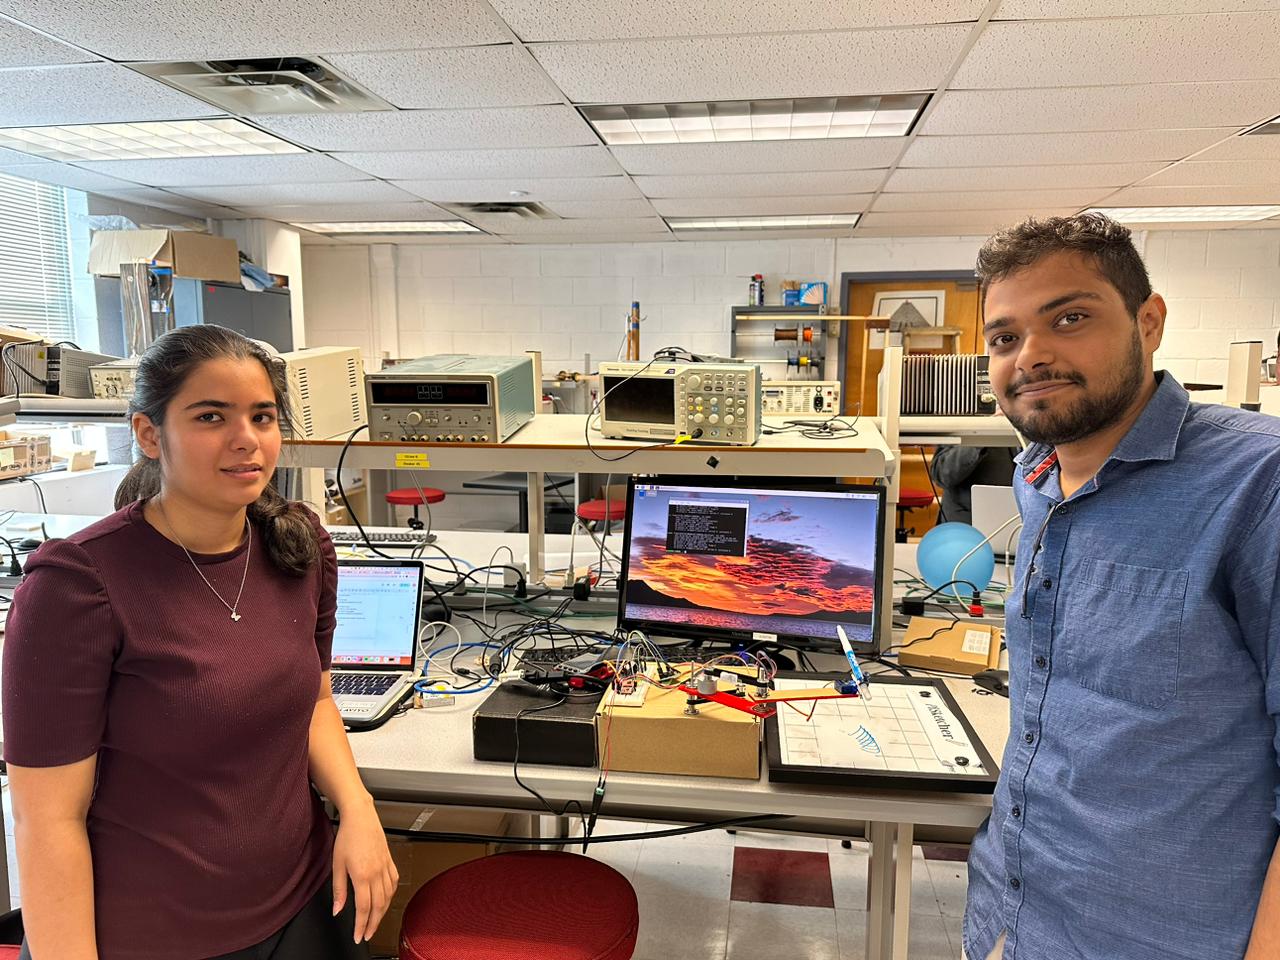
Project Group Picture

Samiksha
snh44@cornell.edu
Software implementation, System Testing

Soumyarup
sl2625@cornell.edu
Mechanical Assembly and Design, Software implementation, System Testing
Parts List
- Flange Coupling Connector ($7.99)
- 4mm x 100mm Steel Model Straight Rod ($9.69)
- Nema 17 Stepper Motor ($4.98)
- A4998 Stepper Motor Driver module with heat sink ($2.67)
- ROHS Stepper Motor, 12 X 12 Stepper Motor: Provided in Lab
Total: $25.33
Code Appendix
Some of the main code has been included here. All the files can be found at following
repository.
import pygame
from pygame.locals import *   # for event MOUSE variables
import os
import RPi.GPIO as GPIO
import sys
import time
import button
import subprocess
from servo_control import pen_lift

# Display on piTFT, Track mouse clicks on piTFT
os.putenv('SDL_VIDEODRIVER', 'fbcon')
os.putenv('SDL_FBDEV', '/dev/fb0')
os.putenv('SDL_MOUSEDRV', 'TSLIB')
os.putenv('SDL_MOUSEDEV', '/dev/input/touchscreen')

pygame.init()

pygame.mouse.set_visible(False)

#create game window
SCREEN_WIDTH = 320
SCREEN_HEIGHT = 240

screen = pygame.display.set_mode((SCREEN_WIDTH, SCREEN_HEIGHT))
pygame.display.set_caption("Main Menu")

#game variables
game_paused = False
menu_state = "main"

#define fonts
font = pygame.font.SysFont("arialblack", 40)

#define colours
TEXT_COL = (255, 255, 255)

#load button images
options_img = pygame.image.load("button_options.png").convert_alpha()
quit_img = pygame.image.load("button_quit.png").convert_alpha()
back_img = pygame.image.load('button_back.png').convert_alpha()
auto_img = pygame.image.load('auto.png').convert_alpha()
manual_img = pygame.image.load('manual.png').convert_alpha()
rect_img = pygame.image.load('rect.PNG').convert_alpha()
tri_img = pygame.image.load('tri.PNG').convert_alpha()


#create button instances
options_button = button.Button(60, 20, options_img, 1)
quit_button = button.Button(100, 140, quit_img, 1)
back_button = button.Button(100, 120, back_img, 1)
manual_button = button.Button(80, 70, manual_img, 1)
auto_button = button.Button(200, 70, auto_img, 1)
rectangle_button = button.Button(60, 20, rect_img, 1)
tri_button = button.Button(60, 120, tri_img, 1)

pen_up = True


def draw_text(text, font, text_col, x, y):
  img = font.render(text, True, text_col)
  screen.blit(img, (x, y))

#game loop
run = True
while run:

  screen.fill((52, 78, 91))

  #check if game is paused
  if game_paused == True:
    #check menu state
    if menu_state == "main":
      if options_button.draw(screen):
        menu_state = "options"
      if quit_button.draw(screen):
        run = False
    #check if the options menu is open
    if menu_state == "options":
      if manual_button.draw(screen):
        menu_state = "manual"
        print("manual")
      if auto_button.draw(screen):
        menu_state = "auto"
      #draw the different options buttons
      if back_button.draw(screen):
        menu_state = "main"
    if menu_state == "auto":
      if rectangle_button.draw(screen):
        subprocess.run(["python3", "rectangle.py"])
        print("Rectangle")
        menu_state = "main"
      if tri_button.draw(screen):
        subprocess.run(["python3", "triangle.py"])
        print("Triangle")
        menu_state = "main"
    if menu_state == "manual":
      # if (pen_up):
      #   pen_lift(1)
      #   pen_up = False
      if rectangle_button.draw(screen):
        subprocess.run(["python3", "control_rect.py"])
        # pen_lift(0)
        # pen_up = True
        print("Rectangle")
        menu_state = "main"
      if tri_button.draw(screen):
        subprocess.run(["python3", "control_tri.py"])
        # pen_lift(0)
        # pen_up = True
        print("Triangle")
        menu_state = "main"

  else:
    draw_text("Begin", font, TEXT_COL, 100, 100)

  #event handler
  for event in pygame.event.get():
    if event.type == pygame.MOUSEBUTTONUP:
      game_paused = True
    if event.type == pygame.QUIT:
      run = False

  pygame.display.update()

pygame.quit()

----------

def motor_control(delay, step_sleep, dir, sig, step_count, ratio):
    from time import sleep
    import RPi.GPIO as GPIO

    DIR = 26       # Direction GPIO Pin
    STEP = 6     # Step GPIO Pin
    CW = 1         # Clockwise Rotation
    CCW = 1        # Counterclockwise Rotation
    SPR = 200       # Steps per Revolution (360 / 1.8)

    # delay = 1/20
    #delay  = 0.1

    GPIO.setmode(GPIO.BCM)
    GPIO.setup(DIR, GPIO.OUT)
    GPIO.setup(STEP, GPIO.OUT)
    GPIO.output(DIR, CW)


    MODE = (13, 6, 5) # Microstep Resolution GPIO Pins
    GPIO.setup(MODE, GPIO.OUT)
    RESOLUTION = {'Full': (0, 0, 0),
                'Half': (1, 0, 0),
                '1/4': (0, 1, 0),
                '1/8': (1, 1, 0),
                '1/16': (0, 0, 1),
                '1/32': (1, 0, 1)}

    GPIO.output(MODE, RESOLUTION['Half'])
    GPIO.setmode(GPIO.BCM)
    GPIO.setup(DIR, GPIO.OUT)
    GPIO.setup(STEP, GPIO.OUT)
    GPIO.output(DIR, CW)
    GPIO.setup(MODE, GPIO.OUT)
    GPIO.output(MODE, RESOLUTION['Half'])

    from time import sleep
    import RPi.GPIO as GPIO

    in1 = 12
    in2 = 16
    in3 = 20
    in4 = 21

    # careful lowering this, at some point you run into the mechanical limitation of how quick your motor can move
    #step_sleep = 0.01

    # defining stepper motor sequence (found in documentation http://www.4tronix.co.uk/arduino/Stepper-Motors.php)
    step_sequence = [[1,0,0,1],
                    [1,0,0,0],
                    [1,1,0,0],
                    [0,1,0,0],
                    [0,1,1,0],
                    [0,0,1,0],
                    [0,0,1,1],
                    [0,0,0,1]]


    # setting up
    GPIO.setmode( GPIO.BCM )
    GPIO.setup( in1, GPIO.OUT )
    GPIO.setup( in2, GPIO.OUT )
    GPIO.setup( in3, GPIO.OUT )
    GPIO.setup( in4, GPIO.OUT )

    # initializing
    GPIO.output( in1, GPIO.LOW )
    GPIO.output( in2, GPIO.LOW )
    GPIO.output( in3, GPIO.LOW )
    GPIO.output( in4, GPIO.LOW )

    GPIO.output( in1, GPIO.LOW )
    GPIO.output( in2, GPIO.LOW )
    GPIO.output( in3, GPIO.LOW )
    GPIO.output( in4, GPIO.LOW )

    motor_pins = [in1,in2,in3,in4]
    motor_step_counter = 0
    step_count0 = step_count*ratio
    print("Step count 0 is " + str(step_count0))
    step_count1 = step_count
    x = step_count0
    y = step_count1
    print(x)
    #sig = 1
    if (int(sig)>0):
        direction = True # True for clockwise, False for counter-clockwise
    else:
        direction = False
        print(direction)
    while (1):
        #print(x)
        while x>0 or y>0:
            if x>0:
                i = 0
                for i in range(ratio):
                    for pin in range(0, len(motor_pins)):
                        GPIO.output( motor_pins[pin], step_sequence[motor_step_counter][pin] )
                    if direction==True:
                        motor_step_counter = (motor_step_counter - 1) % 8
                    elif direction==False:
                        motor_step_counter = (motor_step_counter + 1) % 8
                    else: # defensive programming
                        print( "uh oh... direction should *always* be either True or False" )

                        exit( 1 )
                    sleep( step_sleep )
                    x = x - 1
                print(x)
            if y>0:
                GPIO.output(DIR, dir)
                GPIO.output(STEP, GPIO.HIGH)
                sleep(delay)
                GPIO.output(STEP, GPIO.LOW)
                sleep(delay)
                y = y - 1
                print(y)
        #GPIO.cleanup()
        break
    return 0

    -------------

    from time import sleep
import RPi.GPIO as GPIO
DIR = 26       # Direction GPIO Pin
STEP = 24      # Step GPIO Pin
CW = 1         # Clockwise Rotation
CCW = 1        # Counterclockwise Rotation
SPR = 200       # Steps per Revolution (360 / 1.8)

delay  = 1/20

# GPIO.setmode(GPIO.BCM)
# GPIO.setup(DIR, GPIO.OUT)
# GPIO.setup(STEP, GPIO.OUT)
# GPIO.output(DIR, CW)

MODE = (13, 6, 5) # Microstep Resolution GPIO Pins
# GPIO.setup(MODE, GPIO.OUT)
RESOLUTION = {'Full': (0, 0, 0),
              'Half': (1, 0, 0),
              '1/4': (0, 1, 0),
              '1/8': (1, 1, 0),
              '1/16': (0, 0, 1),
              '1/32': (1, 0, 1)}

# GPIO.output(MODE, RESOLUTION['Half'])

class Motor1:

    def __init__(self):
        GPIO.setmode(GPIO.BCM)
        GPIO.setup(DIR, GPIO.OUT)
        GPIO.setup(STEP, GPIO.OUT)
        GPIO.output(DIR, CW)
        GPIO.setup(MODE, GPIO.OUT)
        GPIO.output(MODE, RESOLUTION['Half'])

    def run(self, dir, step_count):
        print("in thread for motor 1")
        GPIO.output(DIR, dir)

        for x in range(step_count):
            GPIO.output(STEP, GPIO.HIGH)
            sleep(delay)
            GPIO.output(STEP, GPIO.LOW)
            sleep(delay)

        self.cleanup()


    def cleanup(self):
        # GPIO.output( in1, GPIO.LOW )
        # GPIO.output( in2, GPIO.LOW )
        # GPIO.output( in3, GPIO.LOW )
        # GPIO.output( in4, GPIO.LOW )
        GPIO.output(STEP, GPIO.LOW)
        # GPIO.cleanup()

  -----------------------

  from time import sleep
import RPi.GPIO as GPIO

in1 = 12
in2 = 16
in3 = 20
in4 = 21

# careful lowering this, at some point you run into the mechanical limitation of how quick your motor can move
step_sleep = 0.02

# defining stepper motor sequence (found in documentation http://www.4tronix.co.uk/arduino/Stepper-Motors.php)
step_sequence = [[1,0,0,1],
                 [1,0,0,0],
                 [1,1,0,0],
                 [0,1,0,0],
                 [0,1,1,0],
                 [0,0,1,0],
                 [0,0,1,1],
                 [0,0,0,1]]

DIR = 26       # Direction GPIO Pin
STEP = 24      # Step GPIO Pin
CW = 1         # Clockwise Rotation
CCW = 1        # Counterclockwise Rotation
SPR = 200       # Steps per Revolution (360 / 1.8)
delay = 1/20
# delay = 1

MODE = (13, 6, 5) # Microstep Resolution GPIO Pins
RESOLUTION = {'Full': (0, 0, 0),
              'Half': (1, 0, 0),
              '1/4': (0, 1, 0),
              '1/8': (1, 1, 0),
              '1/16': (0, 0, 1),
              '1/32': (1, 0, 1)}

class Motor2:

    def __init__(self):
        # setting up
        GPIO.setmode( GPIO.BCM )
        GPIO.setup( in1, GPIO.OUT )
        GPIO.setup( in2, GPIO.OUT )
        GPIO.setup( in3, GPIO.OUT )
        GPIO.setup( in4, GPIO.OUT )
        GPIO.setup(DIR, GPIO.OUT)
        GPIO.setup(STEP, GPIO.OUT)
        GPIO.output(DIR, CW)
        GPIO.setup(MODE, GPIO.OUT)
        GPIO.output(MODE, RESOLUTION['Half'])

        # initializing
        GPIO.output( in1, GPIO.LOW )
        GPIO.output( in2, GPIO.LOW )
        GPIO.output( in3, GPIO.LOW )
        GPIO.output( in4, GPIO.LOW )

    def cleanup(self):
        GPIO.output( in1, GPIO.LOW )
        GPIO.output( in2, GPIO.LOW )
        GPIO.output( in3, GPIO.LOW )
        GPIO.output( in4, GPIO.LOW )
        # GPIO.cleanup()

    def run(self, angle):
        print("In motor 2 thread")

        motor_pins = [in1,in2,in3,in4]
        motor_step_counter = 0
        step_count =  int(abs(int(angle))*4096/360) # 5.625*(1/64) per step, 4096 steps is 360°
        print("Step count is " + str(step_count))
        if (int(angle)>0):
            direction = True # True for clockwise, False for counter-clockwise
        else:
            direction = False
        print(direction)
        try:
            i = 0
            for i in range(step_count):
                for pin in range(0, len(motor_pins)):
                    GPIO.output( motor_pins[pin], step_sequence[motor_step_counter][pin] )
                if direction==True:
                    motor_step_counter = (motor_step_counter - 1) % 8
                elif direction==False:
                    motor_step_counter = (motor_step_counter + 1) % 8
                else: # defensive programming
                    print( "uh oh... direction should *always* be either True or False" )
                    self.cleanup()
                    exit( 1 )
            self.cleanup()
        except KeyboardInterrupt:
            self.cleanup()
            exit( 1 )

  -----------------------
import RPi.GPIO as GPIO
import sys
from time import sleep
GPIO.setmode( GPIO.BCM )
GPIO.setup(4, GPIO.OUT)
pwm=GPIO.PWM(4, 50)
pwm.start(0)

if (int(sys.argv[1])):
    pwm.ChangeDutyCycle(5)
    sleep(0.1)
else:
    pwm.ChangeDutyCycle(12)
    sleep(0.1)